|
Graphics Interface |
| Graphics
Interface 2005 http://www.graphicsinterface.org/ May 9-11, 2005 London, Ontario, Canada |
The Graphics Interface proceedings are printed directly from PDF files. The result is a high-quality printed proceedings and easier access to papers for everyone, since the electronic versions of the papers are also used for electronic archival and dissemination. However, a little extra work will be required from you, the authors---hopefully not too much, but read the following instructions carefully. Some of the following is not so much instructions as information to help you generate the best possible electronic submission. The giformat.pdf file has additional information and instructions on the format we require papers to be presented in.
We require for each accepted paper the following:
By 8 March 2005:
By 15 March 2004:
These hardcopy items must be mailed to Michael McCool (the proceedings editor) at the address below, and must arrive by the 15 March 2005 deadline.
Michael McCool,
School of Computer Science
University of Waterloo
200 University Ave W,Waterloo, Ontario N2L 3G1
Department Telephone (for couriers): (519) 888-6797
Personal Telephone (for inquiries):
(519) 888-4567 x3561
Fax: (519) 885-1208
Email:
mmccool@uwaterloo.ca
Optionally, you may include the following:
The second, online-optimized PDF file and additional data can be uploaded at the same time as the mandatory PDF file required for printing.
The following points are the most important things to remember. They are described in more detail below.
Colour images will ultimately be converted to CMYK. You can do this yourself if you wish to address any gamut-mapping problems in advance. If you want to superimpose black text on the image, it is strongly recommended that you convert to CMYK and put the labels in only the K channel.
If you want to get feedback on formatting or need help generating your PDF files, email the proceedings editor at least a week before the final submission date.
These instructions are in one big file to make it easier to download and print them. Use the following links to jump to a particular section.
If you have any questions about these instructions, suggestions for improving them, or questions about the printing and distribution process, please contact Michael McCool via mmccool@cgl.uwaterloo.ca, who coordinates the assembly of the proceedings. If you are having problems uploading papers, please contact the program chairs at van@cs.ubc.ca
Charges for papers will be assessed as follows:
Payment for printing charges should be submitted along with the GI2005 release form. VISA charges, MasterCard charges, or cheques made out to the Canadian Human-Computer Communications Society should be included with the release form. Papers without a signed release form or without payment for page charges will not be printed.
We would like to print, whenever possible, from electronic versions of your paper. You are also asked, however, to submit two hardcopies of your paper. We will use these hardcopies for three purposes:
The first hardcopy, the "camera-ready" copy, should be clean, without staples, with colour images already attached, and should be placed in an envelope.
For your camera-ready copy, if you care a lot about colour you will want to submit photographs, or other continuous-tone output, not typical colour printer output. Please mount these in the correct places on your paper with a gluestick, and write the figure name (lightly) on the back of each image in case it becomes detached.
Using photographs is up to you. Just be aware that if we have to scan your paper, some colour printouts will not reproduce accurately, or the scanning may introduce Moiré patterns if the images you submit were halftoned.
If you insist that we scan your camera-ready hardcopy, please send email to mmccool@uwaterloo.ca to this effect. However, we still want a full electronic PDF submission for electronic distribution and archival.
The second hardcopy, the "reference" copy, should have page numbers written on the front top of each page, should be stapled in the corner, and does not have to be printed in colour (i.e. it can be a photocopy of the camera-ready copy).
Electronic submission, via a PDF file, is mandatory. Electronic versions of your paper should be submitted to the GI2005 electronic submission web site.
Papers must be formatted as PDF documents. We will use your submitted PDF file both for printing and for electronic dissemination. You may optionally submit a second PDF file for online viewing if your main PDF file submission has been optimized for printing (for instance, by using CMYK images, which Acrobat Reader does not currently display very well).
See below and in giformat.pdf for more information on how to optimize your electronic submission for the best possible printing quality.
Convert MS Word files to PDF using Adobe Distiller. Please do not submit PDF unless you use the Adobe "Distiller" plugin. The Adobe PDFWriter plugin produces PDF directly but does not work for Word math fonts. Converting to PostScript and then trying to convert the PostScript on another machine may also not work due to the same font issue. Generally speaking, it's the math font that will cause you the most headaches, so check that math symbols are converting and printing properly. If you are doing a lot of math, you would be better off using pdflatex.
For Word users, a Word template has been provided for your convenience.
A LaTeX template has been provided. You will also need the style file: gipaper.cls
For LaTeX documents, to generate PDF you have three choices:
For more information on the available options please visit the TeX User's Group. We cover each of the options in more detail below. However, in our experience the use of pdflatex produces the best output with the least effort. Conversion of standard DVI files does not produce resolution independent output and so tends to look bad both online and when printed. Use of PostScript fonts in DVI files can be hard and/or costly to set up if you want math fonts, and does not provide access to certain PDF features useful for online viewing. A class file has been provided along with some examples of how to include images, etc. under pdflatex in the GI author's kit.
The first option is to use dvips to convert your regular dvi files to PostScript. As the normal DVI fonts are resolution-dependent, and the output imagesetter is very high resoltion, Please use at least 600dpi fonts, or preferably 1200dpi. PDF produced (via Distiller or ghostview) from dvips output will not have many useful features, in particular if standard TeX fonts are used it may render without antialiasing (so plus signs may turn into minus signs when displayed with Acrobat Reader, etc.). It will also not be searchable, and it will not have a table of contents. It may also be very large. In short, this approach produces a large ugly file, and is not recommended.
The next two options are better, as the fonts will be resolution independent and antialiased upon display.
If you use Postscript fonts the PDF generated by converting Postscript output from dvips will be resolution independent and antialiased upon display. Of course you need Postscript fonts for all your fonts, including the math fonts. We refer you to the LaTeX Companion and the TeX User's Group's web site for information on how to set up Postscript fonts. This may be as simple as invoking the times and mathtimes packages if your system is set up correctly (and you have the mathtimes fonts).
PDF files generated this way will still not have a table of contents or be able to use any online PDF features, like hyperlinked crossreferences. These features are not important to printing, of course, but are convenient for online use.
The last way to generate a PDF file from LaTeX sources is to use the free tool pdflatex, which we highly recommend. This system is built upon pdftex, an enhancement of TeX which can generate resolution-independent, searchable PDF directly. If you also include the standard hyperref LaTeX package when compiling your document, the resulting PDF will automatically have a hierarchical table of contents and citations, footnotes and cross-references will be hyperlinked. You can also reference Web URLs and have a web browser automatically come up when a hyperlink is clicked in the Acrobat reader. This is all demonstrated in the source for the example file available in the GI author's kit. See the TeX User's Group's web site for documentation on hyperref and pdflatex.
The rest of this section is included to help you set up your LaTeX 2e documents in a form suitable for pdflatex. If you do not have pdflatex, obtain and install the teTeX distribution. This is in fact available as a Linux package and is the default distribution on many Linux installations. If you have a Linux system set up, it may already be there, along with all the image conversion tools you'll need. If you're running Windows, the MiKTeX package installs easily and also has all you'll need.
The main issue with modifying LaTeX 2e files into a form suitable for pdflatex is that images must be included using the graphics package, not the obsolete epsf or psfig packages. As a first step, invoke the graphics package in your preamble:
\usepackage{graphics}
Note that a [dvips] option to the above lets you output DVI files instead of PDF. We won't go into that too much as DVI isn't our goal, PDF is. To include images, instead of using
\epsfig{file=filename.eps,width=figurewidth}
or whatever, use
\includegraphics{filename}
Note that the format suffix is optional, and the width and height are automatically inferred from the file. For files that do not have a built-in physical size, the size is inferred by using the image resolution defined in the pdftex.cfg file, which also defines useful things like page size. If a format suffix is not provided for a graphic, pdflatex will first look for a file a file called filename.png. If such a file does not exist, then filename.jpg will be searched for, then if that file does not exist, filename.pdf will be searched for. It's usually more flexible to not include the suffix. Put it in only if you want to force the use of a certain file.
The teTeX distribution includes a tool, epstopdf, to convert EPS files to PDF, and you can also do this with the latest version of ghostview or with Abode Acrobat, Illustrator, or Photoshop. Several public-domain packages (such as ImageMagick) now support PNG files; see the PNG web site for pointers and conversion tools; Photoshop and many other commercial packages now also support PNG. In a pinch, you can use JPEG images for 24-bit images, just set the quality level to 100%.
If you are generating DVI (i.e. you are using the [dvips] option) then latex will search for EPS files rather than PNG, JPEG and PDF files for images. Even in this case it is best to leave off the suffix when you include images, so you don't have to change your source other than the option on the \usepackage{graphics} line in the preamble.
Unfortunately, your image file probably isn't exactly the size you want, especially if the physical size was inferred from the resolution of the image. The graphics package provides a few commands to scale or resize the image. The scalebox command scales a box, and you use it like this:
\scalebox{scale_factor}{box}
where a scale_factor of 1 will leave the box untouched, 0.5 will halve its dimensions, and so forth. Typically you'll put an includegraphics command in the box, like this:
\scalebox{scale_factor}{\includegraphics{filename}}
The resizebox command resizes a box, possibly non-uniformly. That is, the aspect ratio of the box is not necessarily fixed. This command is handy if you don't know (or care) what the original physical size of the graphic was. You use it like this:
\resizebox{width}{height}{box}
Sometimes, however, you don't know exactly how tall or wide you want the image. A very common task would be to resize a box so it's as wide as your text, but keeps the same aspect ratio. You can achieve this effect by substituting "!" for either of width or height in the resizebox command (but not both!), so if you wanted an image that was 8cm tall, but otherwise with the original aspect ratio, you'd do this:
\resizebox{!}{8cm}{\includegraphics{filename}}
or, if you wanted to have your image be as wide as a column of text, and retain its aspect ratio, you'd use this:
\resizebox{\columnwidth}{!}{\includegraphics{filename}}
Of course, you might also want to center your images, put them in floats, attach captions, etc. A complete template is
\begin{figure}[ht]
\begin{center}
\resizebox{\columnwidth}{!}{\includegraphics{filename}}
\end{center}
\caption{
	An example caption.
}
\label{fig:example}
\end{figure}
Additional files may be submitted for electronic dissemination, using the electronic submission web page. You can, for instance, include larger images or movies.
It is recommended that images be stored as PNG files. GIF files are acceptable, but PNG is better. Really. If you can't use PNG and still want 24-bit images, you should use JPEG images with a high quality setting. Note, though, that PNG can actually store up to 16 bits per colour channel (48 bits per pixel)... If you want to use other formats for images (for instance Radiance RGBE), please let us know by email well in advance.
Source code should be placed in a zip or compressed tar tgz archive. If you want to submit additional documents, convert them to the PDF format, as above, if at all possible.
Please note that any additional material you submit will be made available on the GI website, and must be released for such purposes using the GI2005 release form
We are not placing an a priori limit on the amount of space you may use, but we expect you to be reasonable. If you want, include a note on the electronic submission page to list priorities in case we have to trim.
COLOUR MAY ONLY BE PRINTED ON ONE SIDE OF EACH
PHYSICAL PAGE.
EACH PHYSICAL PAGE FORMS AN ODD-EVEN PAIR. THE FIRST PAGE OF YOUR PAPER WILL BE
ODD.
PLEASE remember this! This restriction is a nuisance but greatly reduces the cost of colour printing.
The upside is that the printing technology we will be using will be full process colour, and so should be of high quality. However, colour pages will be relatively expensive. Our charging policy for colour pages involves a small fee for the first colour page and a larger fee for additional pages. However, these charges do not recover our costs and our current total budget is only for 15 colour pages. The budget was based on the number of colour pages in previous years of Graphics Interface. Don't compromise your overall presentation, but please do not use colour unnecessarily, and try to group colour images if possible.
Odd pages will always be printed on the right-hand side of the open proceedings. This means that papers can be 8, 10, 12 pages, etc. long but there is no savings in having a paper with an odd number of pages. The charging formula for extra pages reflects this.
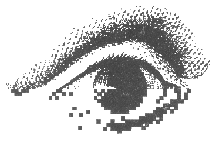
The printer will be halftoning images when preparing your documents for reproduction. Therefore, do not halftone your greyscale source images, leave them as continuous tone. Unless, of course, halftoning is the point of your paper.
Your source greyscale images may in fact be in colour, but they will be converted to greyscale if you don't specify colour. This may be a reasonable thing to do as the colour images will still show up in the electronic version distributed via the website.
Please follow the formatting guidelines when preparing your paper, particularly the margins and the 8.5x11 INCH PAGE SIZE. We need to have space to put in the correct headers and footers and also bind the proceedings. Following the other formatting conventions will give the overall proceedings a professional, coherent look. Keeping the page size consistent lets me automate the process of putting on the page numbers and the headers, and create one master PDF file for the printers. If the page size or margins are inconsistent this becomes really difficult, so help me out, OK?
Good luck with preparing your manuscripts and see you all at the conference!
|
Canadian Human-Computer Communications Society |